Inline image as base64

As you probably know, a web page can load CSS or JavaScript code from external files, but the same code can also be embedded into the HTML.

Maybe fewer people know you can do the same with the images. Usually, you don’t do it because most of the time the size of the images is so big that if you embed them the HTML would become too big. But it’s not always so. In some cases inlining a light image into the HTML can drastically improve the performance of your website.

In principle, we can say the HTML should never be bigger than the following sizes depending on the available internet connection:

Broadband ~200kB
Dialup ~50kB
Mobile ~100kB
Almost nobody uses nowadays the connection Dialup, but if your website is visited by many users who are located in places where the connection Dialup is still used, you should not have an HTML that is bigger than 50 kB. In all other cases, the HTML should never exceed 100 kB.
If the size of the HTML exceeds the limit given by the internet connection, the TTFB (time to the first byte) would increase too much. Until the limit is not exceeded, the TTFB will increase with the HTML size, but the increase will be almost imperceptible.
Don’t confuse the complexity of the DOM with the HTML size. Many times a big HTML is also more complex in terms of a number of elements, but it’s not always so. If the size of HTML increases because you inline an asset, it doesn’t become more complex, only heavier in terms of kilobytes.
The complexity of the DOM is mainly important for the parsing of CSS and JavaScript, but it has nothing to do with the TTFB. The size it has, but as said the impact becomes a lot more important if the size exceeds the limit.
If you inline all that the page needs for the first rendering, the render-blocking time will be lower and the user will have the impression of a fast page loading because the browser doesn’t need to wait for the resources, they are already embedded inside the HTML.
In shorts:
– Inline asset => faster rendering, but bigger HTML size
– External asset => the browser has to wait until the asset is downloaded and ready before rendering the elements that need that asset.
External assets can also be cached by the browser. So, let’s say you have advantages and disadvantages and you should always analyze the situation before deciding to inline an asset or call it externally.
In principle, if the asset is not big and the browser needs it for the first rendering, better inline. On the contrary, if the asset is big and the browser doesn’t need it for the first rendering, better to call it externally. In some cases the asset is big and you need it for the first rendering. In this case, it means the design of the web page is not so accurate in terms of performance, but if so, you should perform some tests and see what is better for your specific case. Take into account that if that asset is needed also on other pages, maybe it will be better to call it externally because you can take advantage of the browser cache.
There are tons of tutorials about this topic, but usually people inline CSS and JavaScript, but fewer times the images.
If the browser needs an image for the first rendering, and that image is not so big, most of the time if you inline it, the performance of your website will improve.
In the case of a light logo for example it would be convenient to inline the image.
You can inline an image converting it to base64 and replacing the src parameter with the encoded image.

To make my life easier I’ve created the plugin Inline Image Base64, you will find it on the official WordPress repository. I hope it will be a help also for you.

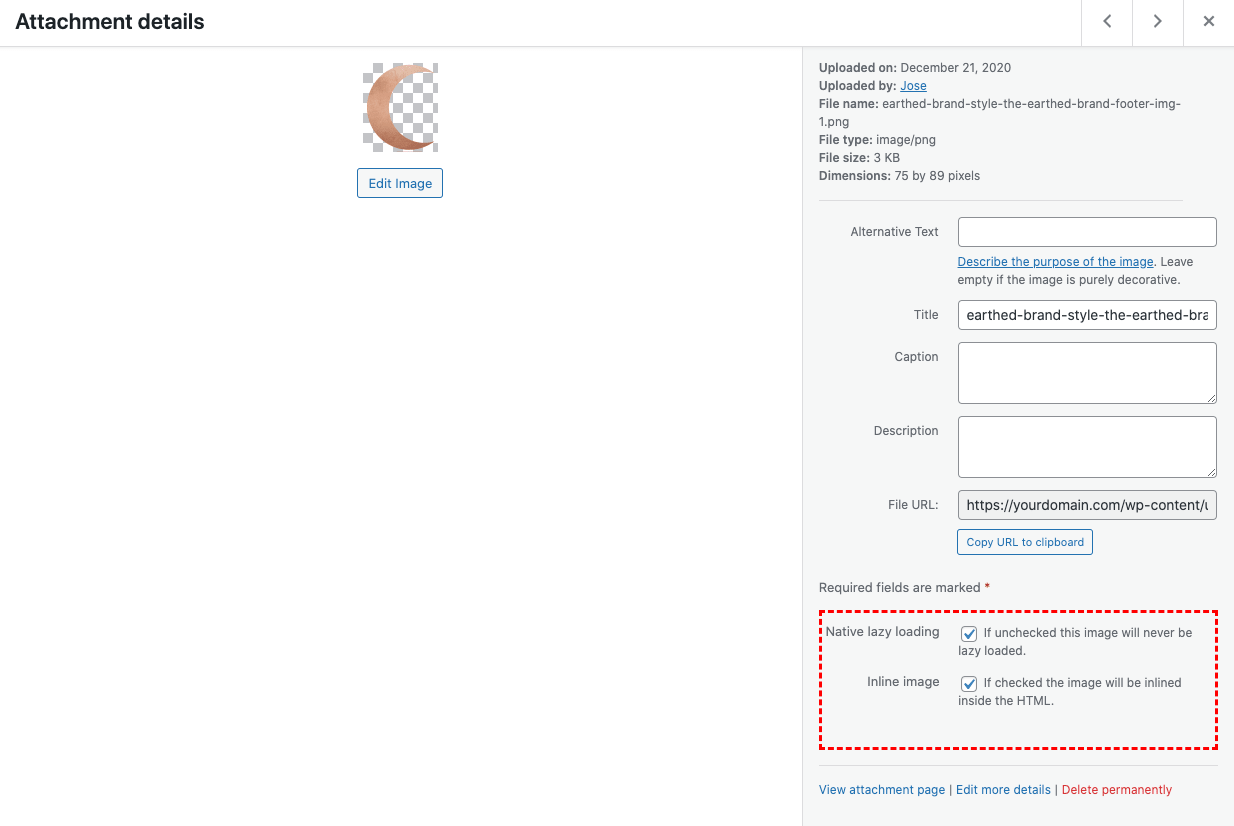
Just install and activate it, and you will find two checkboxes when you open an image in the media library.

The first checkbox is to disable the native lazy loading for all those cases when you don’t want to inline the image, but because it appears in the viewport during the first rendering you also don’t want any lazy loading for that image. The second checkbox is to convert and inline the image.

To reach the best performance, better you assign the width and the height of the image with custom CSS. The plugin will add the class iib64-xxxx where xxxx is the image ID.

So, your CSS will be something that looks like: .iib64-1073{width:200px;height:90px}

In this example, the ID of the image is 1073 and we assign a width of 200 pixels and a height of 90 pixels.

Of course, the CSS to assign the size of the image must be embedded into the HTML and be parsed before the image appears in the viewport, so inline it in the head.

Inlining images directly in the HTML